Back in 2013 I already made a tutorial about this topic here on my blog, but this time I want to go more deeply into it with having more knowledge and experience about it - also with additional video material.
Note: Your PS2 has to be able to run copied games - either with having an integrated chip, using ESR or running the game from the local or external hard disk drive - or via LAN if you like it that way. For testing this whole scenario I would recommend you to have an emulator, but more on that later.
1) Copy the disk to your PC
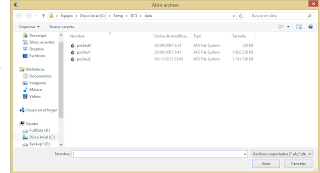
Select a folder to copy the content of the DVD on your local drive. It contains the folders 'BIN', 'DATA' and 'IRX' plus two files to give the disk an ID (also it looks different depending on the version - EU or US). For the music modding you just need to focus on the folder 'DATA'.

2) Open the AFS file with '2' in it using DKZ Studio
Within the folder 'Data' you'll find a file named like PZS3US2 (in the US version) or PZS3EU2 (European version). You need to open this file with the tool DKZ Studio, which you can find online.
As you can see then this archive is filled with a huge amount of files from the game, mostly with character voices or noises as adx files. With double-click you can listen to every piece of sound because luckily the software has en adx player included.

With this huge amount of files it's divided in three pages and you'll find the actual background music close to the end of the third pages. The files are named like this: zs3_00_US.adx (again, US version).
3) Changing the background music
So and here's the interesting part: In order to change the music you need to convert your music to the adx format. So you need to go and check for the PES Sound File Converter. With that tool it's pretty easy to do. Click on 'Add' to select the files you want to convert, go 'Next', select the output folder and the process will run. And: Also mark that the song should run in a loop!
Before in terms of the file itself there's only one thing you need to look after: The size. As you can see in the screenshot above all the files are having a size between 3 and 5 MB. The created adx file should have a lower size than the file you want to change it with in order to work without any conflicts or error messages. So you need to shrink your mp3 files to a lower quality. I used the video editing tool Sony Vegas for that, but there are surely better ways to manage that.
So let's say you now have an adx file with a suitable file size, then you need to rename it to the file you are planning to change it with. Then, - in DKZ Studio - right-click the music file which is about to change, click 'Import' and select your converted file with the same name. If no error message shows up, the whole process worked out. Now, do the same with other music tracks you are planning to change. You'll also notice on the file icon which files were already changed.
4) Create a patch
With every change done the whole thing should be saved. By using 'File' and 'Save' I sometimes ended up not having the correct size of the afs file which meant lots of files were missing.
So I recommend the following way: Create a patch with all your changes! So go to 'Patch' and select 'New Patch (With Modified)'.
A dkz file will be created. The file includes your music and after double-clicking it you have to select 'Patch' and then 'Apply patch in folder' before choosing the destination folder. So go to the place where you extracted your DVD and select the 'DATA' folder. All changes will be applied. Now check if the file size didn't drop and also the changing date of PZS3US2.afs should be quite up-to-date.
5) Burn it and test it!
I'd recommend to use IMGBurn to create an ISO file with the extracted DVD files including your changed afs file. Confirm the suggested label name and let the process run.
 With a completed ISO image you need to find a way to test it. A quick and fast check would be possible with an PS2 emulator like PCSX2. You only need to find a matching BIOS. Of course you can also burn it or copy it to your hard drive directly but it would be good to know if it really works.
If you changed the first file (zs3_00_US.adx called 'The Meteor') you directly notice after the intro video if the process worked.
To check all the background music, go to 'Duel', select two fighters and while selecting the stage you can move to the right to check all the BGM. Have fun to fight with your own music!
And did you notice the screenshots with the new characters? If you want to see more, visit the blog and other channels of Kinnikuchu. A tutorial from my site will follow soon.


