Saturday, December 30, 2023

Beijing Airport and the Firewall...


An 8 hour stopover in Beijing, not the first time, so I was aware that using things like Google, Facebook could be tricky. I installed NordVPN on my phone as well. In 2019 it allowed me to avoid the firewall and at least I could send some messages. But not so this time at the end of 2023...

By now, also NordVPN was blocked and I couldn't connect to any country. Didn't really think of a Plan B, thought it's just 8 hours, no problem. But then I saw my flight is getting delayed by an hour. Also no big deal, but would be nice to inform my sister who was going to pick me up. 

As Google and Facebook things don't work... I remembered that I still got a Yahoo mail address... But I need a SMS verification code to login - which I couldn't receive there...
Creating a new email address with some German providers ... No, even though these websites generally worked, the providers blocked China from creating new accounts.

Interestingly, despite the firewall I could still receive push messages like from WhatsApp, but of course answering them didn't work.

Then I thought that probably TikTok would work... Well, of course PlayStore doesn't work either.
Since I'm ironically still using a Huawei phone, I could use its specific app store. And then I saw Snapchat.. And I know that my sister uses it.

Installed it, luckily no email verification needed and as the app searched through my phone contacts, I could easily find her. 

Problem solved, but my sister was quite surprised to see me on Snapchat...^^

Tuesday, May 31, 2022

Extend your Japan Visa online, but don't use Gmail!


With having finally the option to extend my Japan visa online, I thought I'd give it a go this year. But I ran into some interesting roadblocks...


First off all, a MyNumber card (マイナンバーカード) is required which I already got last. 

Then you need a card reader for your PC which can read the MyNumber card. In my case I got the 接触型ICカードリーダー from Goppa. 

Once everything's connected you need to install the JPKI利用者ソフト, and also add the browser plugin (such as from Google Chrome).

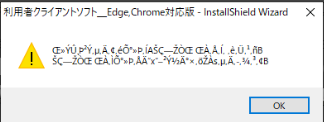
Some little font issue...

To ensure that the card reader works, I connected my card and opened the JPKI software to check. Interestingly, despite my PC having been set to Japanese language, sometimes letters could not be properly displayed.

Solution: In "Control Panel > Region > Administrative > Change system locale..." the language needs to be set to Japanese with ""Beta: Use Unicode UTF-8 for worldwide language support" to be unchecked.

Following that things like my visa expiration date could be read from the MyNumber card properly. Everything can only be read after entering your PIN(s) of course.

Then it was time to go to that immigration website and create an account (登録).

During that process you fill out basic information such as where you live.
After the final screen (Step 3) the screen displays a message that I should receive an email to continue - and which should also allow me to create a password for the account.

I'd also recommend making a screenshot or writing down the 認証 ID. Especially considering what happened next...

The Mail to Change your Password...

I waited a few days to the next weekend where I still didn't receive an email. So I tried to use the "Change Password" option to trigger the email to be resent. As expected nothing happened.

Following that I emailed the support email address which is mentioned on that site. About 24 hours later I got the answer that it's not recommended using so-called フリーメール (free email services) such as Google, Hotmail or iCloud.

As that Immigration website uses a system which restricts access to overseas IP addresses.

Wow. That wasn't mentioned anywhere on that website.

At that point I wondered which email provider I could actually use. So I started researching online, but since that system is quite new, it was hard to find any information regarding that topic. 

Luckily I found an article on spouse-visa.jp explaining the whole process (which was luckily just posted the day before), where it's mentioned that Yahoo email addresses (assuming ending with co.jp) can actually be used.

Luckily I created a Yahoo address at some point before, so I rechecked whether I could actually log in again.

Following that I called my local immigration office as recommended in the previous email in order to change the email address of my already registered account.

However I got advised to call the number of that other company doing the support of that site. So I called there as well, but they actually cannot change the email address and told me to call the Immigration office again.

So I coincidentally ended up with the same guy as before again, but after explaining the situation I got send to another co-worker.

Here I finally got the chance to change my email address, but that person advised me that it's not recommend to use any free mail service, even Yahoo would not be possible.

Mail services coming from a phone provider such as Softbank should rather be used.
However I insisted on using a Yahoo address for now and in case it still wouldn't work, I could call again. The guy on the other side then kindly changed my email address as requested to my Yahoo one.

He said it could take around 30 minutes to a few hours for the changes to take effect.
I was quite hopeful that it would work, but you never know, so I went for a walk, came back a
nd in fact after a bit more than an hour even a confirmation email for the "email address change" had arrived on my Yahoo address. 

I tried the password reset and even that email arrived immediately.

From here on onwards I could continue to fill out the forms and upload all the documents I had prepared. Also here I kept using my Yahoo address as further mails regarding my visa would go there as well (keep checking there occasionally or forward it).

Such as the final confirmation mail which came the day later.

Now my new residents card should be on its way soon.

Monday, February 15, 2021

Canon IJ Scan Utility settings get overwritten by default settings - Fix

The Canon IJ Scan Utility is a common tool to receive documents from a scanner on your PC - which I use for quite some years already. You can set it up in a way that for example PDFs are getting automatically attached to a new email. But how can you prevent that your settings get overwritten?

I set up this tool for my parents before, since they only use the scanner to be able to send certain documents via email. However occasionally these settings seemingly get overwritten by the default settings. Not sure whether they accidentally hit the "Default" button or something else is causing it... 

However, after fixing it a few times manually I starting looking for an permanent solution. As I could find nothing via online search I got an interesting (old-school) idea myself.

I had to find out where there the settings are actually saved and it's here:

C:\Users\Andy\AppData\Roaming\Canon\IJ Scan Utility

In this folder there are two files:

UICOM.dat
UIVER.dat


And if you apply changes within the software the time of the "last change" affects these two files. Which led me to the following plan:

1) Set up the Canon IJ Scan Utility settings in the way it should be permanently used

2) Close the application

3) Navigate to the folder mentioned above

4) Go to the Properties of each file and mark "Read-Only"


5) Confirm for both files

6) Now you can test it:
- Open the Canon IJ Scan Utility
- Go to settings, reset settings to default
(Note that the settings initially indeed get reset to default, but...)
- Close the software
- Reopen it
- The default settings are gone, you previously "Read-Only" settings are applied (as the software only reads from these files when it opens)

Hope this can help you! In my case it did! :) 

Sunday, July 12, 2020

Global Protection suggesting Windows VPN Settings...

As a GlobalProtect installation and configuration should usually work quite smoothly I hit by a little roadblock... 

After GlobalProtect is installed I should usually get the dialog to enter the VPN connection settings. Instead I got the following message:

"To establish a VPN connection, select the GlobalProtect VPN configuration from Windows NETWORK & INTERNET VPN Settings." 

So GlobalProtect basically wants me to use the local Windows network settings instead of its own. Initially I couldn't really follow, but I figured that I may went too quickly through the installation.

Once I downloaded the Global protect the installer went straight to the Windows Store and I mistakenly confirmed that following message:

So "accidentally" I installed it the Windows Store version which didn't work in my case as I used a special download before.

Correct would be: "Continue installing from outside the Store".
And then the application worked the way it should...

Just a little thing you easily overlook trying that just before going to bed after a long day...

Friday, May 15, 2020

TheSuperAdmins #008: Home Office Support

Following the Coronavirus pandemic and subsequent "lockdowns", many office workers are forced to work from home. Therefore it's important for the admins to set proper VPN connections for everyone..


With Will residing at his lakehouse watching Netflix, Mike faces several users with wrong VPN settings...

Tuesday, April 14, 2020

Sony Vegas: How to create a multi-screen channel trailer?

Recently a friend asked me to create a trailer for his Let's Play Gaming Channel. So I got the idea to create a wall of TVs where each screen shows a different game he is playing with the camera moving around from one screen to another...

Even though I'm quite familiar with Sony Vegas, I haven't done something like that before. That's why the whole process was so interesting and the result so satisfying. That's how the final version looks like:


Not too bad, right? So let's go step by step explaining on how to make such a trailer.

1) Creating a TV wall
For doing that you either look for a fitting image online or create your own one. Make sure you can it has about as many screens as video clips you want to use. Once you've chosen a picture you put at the bottom of your project. 2) Put the clips on the screens
I downloaded like 12 videos of different games from my friend's channel. Then I started one by one, putting a video file above the TV wall template and minimized them by clicking on the icon at the edge of the clip in the timeline to open a window. Then you can accurately adapt the size of the clip and move it around to match on one of the TVs of your template.

That step you do with every clip until your TV wall is finished. That wall full of screen may looks like this.


3) Rendering the TV wall video
Following that I rendered like a 30 second clip of that wall. This new file I copied into my project.

4) Let the "virtual camera" run Now you work with your newly created TV wall clip in your project. Click again on the small icon at the bottom of your clip (see first screenshot in Step 1).

At the bottom of that menu you see a timeline where you can set time markers. Now you can decide where to place the "F" window at each second.


You can zoom in, zoom out. Experiment a bit which works the best for you. In my case it worked best not to leave the gaps too big as moved the "F" window slowly from right to left to show the channel logo at the end.

And that way you can create this kind of trailer video. For music I chose to use a fitting track in the YouTube Audio Library.

I hope I could help or inspire you to create a nice channel trailer.

Btw. I also made a tutorial video about it, if you wanna see a deeper explanation:


Tuesday, April 7, 2020

Sony Vegas: How to Use Speech Bubbles

Is there a proper way to create speech bubbles with Sony Vegas? Not really, but there's a quite simple way doing it in combination with GIMP.

Surely, you can also just download pictures from a Google image search, but if you wanna create a customized speech balloon, I'd recommend using the free GIMP software. So, step by step:

1) Open GIMP, and create a new project with an empty layer. Ensure that the layer is transparent.


2) Use the pencil to draw a speech bubble. Alternately, you can create by using the circle form.

3) Fill the inner part of the bubble with white color


4) Save the file as png to keep the background transparent.

5) Go back to your Sony Vegas project


6) Add the png file into the project

7) Adapt the file to the same ratio as the video you are making (e.g. 16:9)

8) Adjust the speech bubble to the size you need it

9) Add an extra text box with the text for the speech bubble

And that's it. Also check out the corresponding video below: